4-ingredient lemon pie filling


Good for anytime of year!

I love old fashioned ice-box cakes. Lemon pie is always a big winner. Lemon pie is a chilled, thick custard that can be topped by meringue. (That is, if you have the arm muscles or a mixer to whip it up.) Easy to make, the hardest part of this recipe is having the patience to wait for it to set and cool.  It would be perfect to make the night before a party or a special meal.

This pie goes will with heavier dinners!


Ingredients

  • 1 14-ounce can of sweetened condensed milk
  • 1/2 cup of lemon juice
  • 2 tablespoons of lime juice
  • 3 large egg yolks, well beaten


Directions

  • Preheat your oven to 325 degrees Fahrenheit or 165 degrees Celsius.
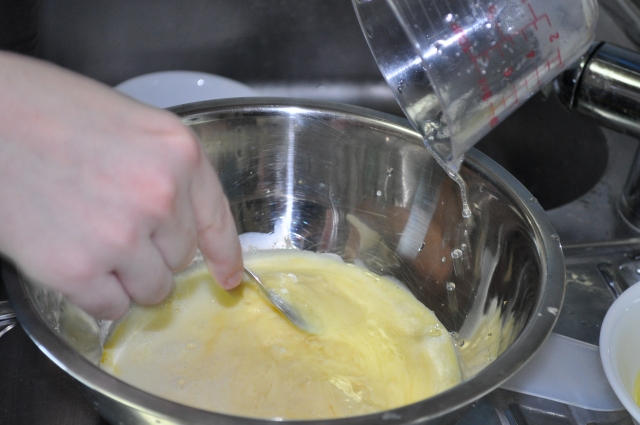
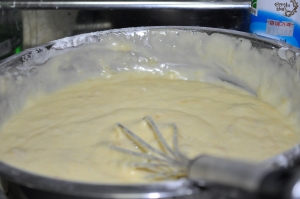
  • Combine beaten egg yolks, can of condensed milk and lemon and lime juices in a large bowl. Whisk until well combined.
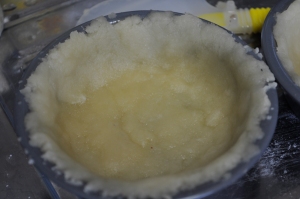
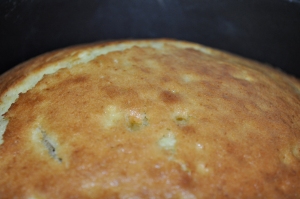
  • Pour filling into one  8 or 9-inch single pie crust. Bake 35 minutes until it’s firm.
  • Cool for one hour, then let chill in the fridge for at least 2. This will keep meringue-less for a couple of days in the fridge.

Thoughts for the Day:

  •  There are many variations of this recipe everywhere. I like my version because it combines both lemon and lime juices so that the lime flavor really brings out the lemon. You could eliminate the lime juice altogether for a more subtle lemon taste.
  • I highly recommend my easy pie crust to go with this recipe. The flaky pie crust and thick custard go very well together. Or you can use tartlet pans if you prefer, there’s no change on the bake time.
  • Most meringue recipes call for 3 egg whites anyways so save your egg whites if you want a garnish!

Great recipe to do with kids!

Posted in birthday party, breakfast food, classic recipes, coffee, Comfort food, cooking with students, dessert, fruit, lemon, lemon pie, less than 5 ingredients, lime, Mexico, party food, pie, pie crust, quick pies, South Korea, travel, Uncategorized | Tagged , , , , , , , , , , , , , , , , , , , | 1 Comment

No Bowl Pie Crust

All the credit without the headache.

Pie crusts can be an art. There’s something so homey about making your own pie crusts, but let’s be honest it can be tricky to do at the best of times. Like many others, I tended to avoid the whole problem and would grab one from the freezer aisle. Now that I live overseas, that’s not an option.

So here is an honest-to-goodness easy pie crust recipe. At the moment I am only using it for single-crust pie recipes and tartlets. The pie crust turns out flaky and not over-poweringly sweet.

Ingredients

  • 1 and 1/2 cups sifted all purpose flour
  • 3 tablespoons white sugar
  • 1/2 teaspoon salt
  • 1/2 cup of vegetable oil
  • 2 and 1/2 tablespoons milk

Directions

Easy and fun to make!

  • Preheat your oven to 400 degrees F or 200 degrees C.
  • Combine all your ingredients in a 9 inch pie pan and stir with a fork until a soft dough forms.
  • Using your hands pat the dough on the bottom and up the sides of the pie pan until it fills the pie pan.
  • Prick the sides and the bottom on the pie shell with a fork.
  • Bake in a preheated over for 12-15 minutes or until golden brown. Remove from over and use in like normal in your standard pie recipe.

Thoughts for the Day

  • Yes this recipe is that easy. To use in a tart recipe just combine all the ingredients in a bowl then divide the dough amongst your tartlet pans. Cut about 1-2 minutes off the baking time for tarts.
  • You don’t have to cool the crust before you use it in your pie recipe, nor do you have to change the cook time on your pie. I removed the crust from the oven, poured in my filling, returned immediately to the oven and used the same bake time and it was fine.
  • Don’t freak out like I did if the bottom of the pie crusts puff up a bit when they are baking. They will settle back down when you take them out of the oven. 

A good base

Posted in cheese, chocolate, classic recipes, Comfort food, cooking with students, dessert, fruit, Mexico, no bowl recipes, party food, pie, pie crust, South Korea, travel, Uncategorized | Tagged , , , , , , , , , , , , , , , , , | 2 Comments

No-Cook Cream Cheese Frosting

In the previous post about my Simple Banana Cake I recommended topping it with my simple cream cheese frosting. You must remember though that any of the frosting you don’t automatically eat needs to be kept cool. Literally this is the cheapest, easiest frosting I’ve ever made and is fantastically yummy as well!

So delicious and so very easy!

Ingredients

  • 1 (8 ounce) package of cream cheese, softened.
  • 2 tablespoons melted butter
  • 2 tablespoons light brown sugar
  • 1 and 1/2 tablespoons honey

Directions:

  • In a large bowl combine your melted butter with your brown sugar and cream cheese. Using a fork or an electric mixer, beat on medium until you it stiffens and thickens.
  • Add the honey. Cotinue whipping the mixture until it becomes light and fluffy. Make sure not to overbeat!
  • Spread on your cupcakes, muffins, cakes or lick from spoon. Chill any you don’t eat.

Thoughts for the Day:

  • This is absolutely delicious. It would be great on any kind of carrot cake, banana cake or even plain old chocolate.
  • If you try to mix it by hand it’s doable but don’t freak out like I did when, at the two minute mark, you think your arm is about to fall off. 🙂 Happy eating!
Posted in banana bread, birthday party, cakes, cheese, classic recipes, coffee, Comfort food, cooking with students, cupcakes, dessert, frosting, party food, quick bread, South Korea, travel | Tagged , , , , , , , , , , , , , , , , , , , , | Leave a comment

Simple Banana Cake

Better than box mix!

Cakes can be a little daunting. By daunting, I mean I freak out and run for the box mix. However, if you can gather your courage and just give it a try homemade cakes really do just taste better. You also know that when you feed your family a homemade cake it’s less processed foods and more yummy flavors. Besides, who can resist a homemade cake?

I added overly-ripe bananas to the batter and trust me it tasted nothing like banana bread. You could leave the bananas out though and just have a very moist white cake. We also went a little nuts and took half the batter and added dried cranberries to make cupcakes and they were also very good. Happy baking!

Ingredients

  • 3/4 cup of butter softened
  • 3/4 cup brown sugar
  • 3/4 white sugar
  • 3 eggs
  • 3/4 cup of sour milk (see thoughts for the day on how to make)
  • 1 cup of very ripe bananas, mashed
  • 2 and 1/2 cups all-purpose flour
  • 1/2 teaspoon salt
  • 1/2 teaspoon cinnamon
  • 1/2 teaspoon baking soda
  • 1 teaspoon baking powder

Directions

lovely batter

  • Preheat your oven to 350 degrees Fahrenheit or 175 degrees Celsius. Decide if you want to make a two-layer cake with 2 9-inch round pans or one big 9-x-13 and grease and flour your pans.
  • In a big bowl combine your butter, brown sugar, white sugar and eggs. Set aside.
  • In another bowl sift your flour and combine it with the salt, baking soda, baking powder and cinnamon. Slowly add the dry bowl to the wet bowl and stir.
  • Add the soured milk and the bananas and mix well. Pour into pans.
  • For two pans cook for about 20-25 minutes (check after 20). For the big cake cook for 30-40 minutes (check at about 30 and go from there).

cranberry-banana cupcakes

Thoughts for the Day:

  • If you taste the batter before you bake it (which you shouldn’t but I do) don’t freak out like I did. The butter taste before you bake it is almost over-powering. Don’t worry, it evens itself out.
  • We were playing with cupcakes and so we put half the batter in one 9-inch round pan and then, later, added 1/2 cup of dried cranberries to the rest of the batter and made 8 yummy, very different cupcakes.
  • The only tricky part of this cake is the baking time. It seems like banana recipes are always finicky about their oven time, so just start with the minium time and add minutes as needed.
  • Sour milk recipe: Recipes that call for sour milk or buttermilk can be substituted as follows: take 1 cup of milk and add 1 and 1/2 table spoons of lemon juice. Wait for 10 minutes, then use how ever much sour milk you need (like 3/4 of a cup) from 1 cup.
  • Chocolate frosting would be excellent on this cake but Korea was out of chocolate when I made this cake so feel free to use my (super easy) No-Cook Cream Cheese Frosting. If you use my frosting, remember to keep your leftover cake in the fridge. It’s mega-yummy when it’s cold.

A great base you can add to-here's some with chocolate bits!

Posted in banana bread, birthday party, breakfast food, cakes, classic recipes, Comfort food, cooking with students, cranberries, cupcakes, dessert, fruit, party food, South Korea, travel | Tagged , , , , , , , , , , , , , , , , , , , , , , , , , , , , | 1 Comment

Chocolate Expresso Cookies

fancy-pants cookies

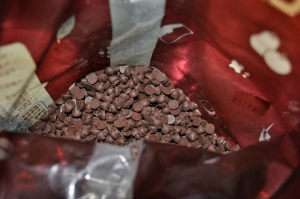
Nothing says “hey we just got married in South Korea” like chocolate. We were very excited to find a 4 pound bag of mini dark chocolate chips and a tub of hershey’s unsweetened cocoa powder at the international market in Itaewon. I thought about making regular ole’ chocolate chip cookies but decided to do something a little more special. Based on a simple chocolate chip cookie recipe they are different yet comforting enough to please any picky eater.

These cookies would be good enough for a kid’s bakeFour bucks worth of chocolate chips! sale, yet pretty enough to give as a gift or to take to an office gathering or adult’s party. These cookies are a little more subtle in their sweetness, and play up the mild taste of coffee.

Ingredients

  • 2 and 1/4 cups of all-purpose flour
  • 1 teaspoon baking soda
  • 1/2 teaspoon salt
  • 1 cup (or 2 sticks) of butter melted
  • 1 and 1/2 tablespoons of instant coffee
  • 2 tablespoons unsweetened cocoa powder
  • 1/2 cup white sugar
  • 1 cup brown sugar
  • 2 large eggs
  • 12 oz or about 2 cups of dark chocolate chips.

Directions

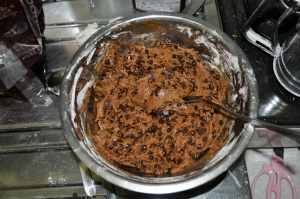
Try to resist eating all of it before you bake!

  • Preheat your oven to 375 degrees Fahrenheit or 190 degrees Celsius.
  •  Sift flour and combine with the baking soda and salt in a  small bowl.
  • In a larger bowl combine your brown sugar, white sugar, instant coffee and cocoa powder. Pour your melted butter on top and mix like crazy. Using a fork, stir in the eggs one at a time. Slowly add your flour mixture. 
  • Fold in the chocolate chips. Pinch off silver dollar-sized balls and drop onto ungreased cookie sheets.
  • Bake for about 10-12 minutes, depending on your oven. Let them cool for a few minutes before you try to move them. Keep in mind that these cookies spead out quite a bit in the pan. Refridgerate any unused dough. Makes about 34 cookies.

Happy fattening friends

Thoughts for the Day:

  • You absolutely have to melt your butter for this recipe. Make sure it is really hot because when you pour it into the bowl it dissolves the instant coffee and the cocoa powder.
  • These cookies are a little more gooey than some other recipes which is why it’s essential to let them cool on the pans before you try and move them.
  • If you really want to be all hoighty-toighty with your cookies, you could take two cooled cookies, spead a generous amount of coffee ice cream between them, wrap them in plastic wrap and stick them in the freezer for about two hours. Behold fancy-scmancy ice cream sandwiches.
  • Don’t freak out like I did when you realize that you have eaten 8 cookies already. I mean, cookies are cookies and they aren’t exactly a vegetable but the dark chocolate and unsweetened cocoa powder make sure that these cookies don’t have quite as much sugar as a standard recipe. 🙂 
Posted in chocolate, coffee, Comfort food, cookies, cooking with students, dark chocolate, dessert, different chocolate chip cookies, party food, South Korea, travel, Uncategorized | Tagged , , , , , , , , , , , , , , , , , | Leave a comment

Fast Fruit Cobbler

Carb-tastic!

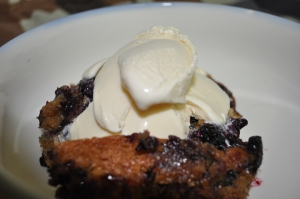
Berries. Blueberries and blackberries are everywhere, even in South Korea. I have to do something with them because I’ve found most men (that I know anyway) consider it wimpy to eat some fruit by itself. I love berries but there is only so many muffins a girl can make. Usually I won’t go through the heat exhaustion of making a pie in the summer but I will make an exception for cobbler. Now I was raised to be scared of cobbler and for some reason labored under the delusion that cobblers had to have a million ingredients and take some sort of mathematical finesse. But then I noticed a few years ago that some of my homemaker friends in America started making this amazingly good, easy cobbler. No one seemed to have a name for it except to call it “the cobbler where you pour the batter first, then put the fruit on top”. There are variations of the basic recipe and this is my version based on what I had here at home. Perfect with ice cream, it literally takes five minutes to whip up. Enjoy!

Ingredients

  • 2 cups berries (usually I use enough blueberries and blackberries to make 2 cups)
  • 1 cup all-purpose flour
  • 2 teaspoons baking powder
  • 1/2 cup brown sugar
  • 1/4 cup white sugar
  • 3/4 cup milk
  • 1/4 cup butter
  • 1 teaspoon cinnamon

Directions

Perfect mid-week treat!

  • Preheat your oven to 325 degrees F or 165 degrees C. Melt the butter and pour into a 9×9 glass pan.
  • Mix together the flour, brown and white sugar, baking powder, cinnamon and milk.
  • Pour the batter into the pan on top of the butter. Spoon fruit on top of the batter. DO NOT MIX.
  • Bake for about 55-60 minutes and golden brown.

Thoughts for the Day:

  • Really you can use all kinds of fruit for this batter as long as you end up with 2 cups total. I have even used blackberries, blueberries and an apple all mixed together and it was very good. Just know that if you use a more “wet” fruit (like berries) it will make your cobbler more moist as opposed to if you use say, peaches.
  • Feel free to add vanilla extract or more cinnamon or whatever you’d like. Basically your cobbler is like a simplified spice cake. Don’t freak out like I did and think that your batter won’t magically “float” to the top by the time the oven timer goes off. It will. Promise!
  • This is one recipe where I think kids would have a lot of fun helping with. It’s also easy enough that they can’t really mess it up.
  • Invest in the ice cream on the side. Absolutely gorgeous. 🙂 Feel free to shamelessly eat the whole dish, by yourself, hiding in the upstairs closet.
Posted in cobbler, Comfort food, cooking with students, dessert, fruit, party food, South Korea, travel, Uncategorized | Tagged , , , , , , , , , , , , | 1 Comment

Bacon and Cheese Popovers

Yummy bacon goodness

Ah Monday. Bleh. Does anyone actually love Monday?

Being a teacher there is rarely a Monday that goes by when I don’t drag my poor body home and dive for the sangria and television. This Monday was no exception. I had the “Monday night dinner” plan of mashed potatoes with veggies and a “simple chicken” (blog about that this weekend). I wanted something nice to go with it so I chose popovers.

If I can do it, you can too!

Quite honestly they are one of the EASIEST things you could bake. Perfect for a weeknight. They look fancy enough to impress dinner guests (or to charm your sweetheart).The good thing is since they only take between 25-30 minutes to bake you can finish up dinner while you’re waiting. A popover is a simple bread that you bake in muffin tins, no paper muffin cup required. They puff up with pride and are super light so you don’t feel so terribly guilty for eating carbs after six pm.

I will be making these many more Monday nights. Wonder if they’re good with a sangria. 😉

Ingredients:

  • 2 eggs
  • 1 cup of milk
  • 1 tablespoon vegetable oil
  • 1 cup all-purpose flour
  • 1/4 teaspoon salt
  • 1/4 cup of shredded cheese (I used a cheddar)
  • 3 bacon strips, cooked and crumbled

Directions:

  • Preheat your over to 400 degrees F or about 200 degrees Celsius. Grease and flour your muffin tins. I used five muffin cups in a six-cup pan and put water in the sixth one. You can use a 12-cup tin if you want but know that this recipe would only make about 8-9 popovers. Fill the empties 2/3 of the way full with water.
  • Beat the eggs, milk and oil in a large bowl. Add the flour and salt. Beat until smooth. Do not overbeat. (Do you hear me? DO NOT OVERBEAT. Put the whisk down.)
  • Fill your greased and floured muffin tins 2/3 full of batter. Sprinkle a bit of your bacon and cheese over each. Cook for between 25-30 minutes. Remove and stab the tops with a fork. Serve warm with butter, honey or even gravy. Anything you don’t eat put in the fridge. 🙂

    It's....growing?

Thoughts for the Day

  • These really are easy. I was torn between being lazy and wanted to make something really good and this fit both.
  • When you cook them don’t freak out like I did when they start looking like demented bacon s’mores and puffing up. They won’t explode.
  • Make sure you really crumble your bacon so it won’t weigh down the popovers too much.
  • A really good breakfast food without tasting too egg-ish.
Posted in bacon, breakfast food, cheese, Comfort food, cooking with students, party food, quick bread, side dish, South Korea, travel | Tagged , , , , , , , , , , , , , , , | 2 Comments

Easy Banana Bread

Guaranteed to cheer up a rainy day.

Monsoon season has hit South Korea. It’ll rain all weekend and I’m not really into the idea of going out and on a 20-minute trek to the grocery store. I’ve noticed my neighbors get a little cranky when it rains. (I don’t know why, their hair looks a lot better than mine.) Perfect excuse to stay home.

The weekend revolves around some baked treat though, and the cupboards aren’t exactly bursting. After playing around I settled on this awesomely easy no-frills banana bread. Yeah I know, everyone has a banana bread recipe. They are the staple food of bake sales and baby showers everywhere. But humor me. See, I normally HATE banana bread. I love this recipe. You should try it!

Ingredients:

I feel like I'm cooking on the space shuttle in my tiny Asian apartment.

  • 2 cups all-purpose flour
  • 1/2 cup of white sugar
  • 1/2 cup of brown sugar
  • 1/2 teaspoon baking soda
  • 1 teaspoon salt
  • 1 teaspoon baking powder
  • 1 egg
  • 5 tablespoons milk
  • 1/2 cup butter (1 stick), room temperature
  • 2 large bananas, mashed

Directions:

  • Preheat your oven to 350 degrees F or 175 degrees C.
  • Sift your flour and mix it with your salt, baking powder, baking soda and cinnamon. Set aside.
  • In another bowl combine your sugars and butter. Add your beaten egg and banans. Mix like hell. Slowly add in your flour mixture and stir. Add your milk. Stir some more.
  • Pour your batter into a greased and floured standard 9 by 5 loaf pan or into two smaller loaf pans. Pop into your preheated oven for about 40-50 minutes. Just watch it. It’ll puff up quite a bit and after about 45 minutes stab it with something (like a chopstick) to see if the middle is done.

It takes about 10 minutes to mix it all together.

Thoughts for the day:

  • If your butter isn’t room temperature, heat it up with a hair dryer.
  • When combining your sugars and butter mash it with a spoon. I don’t have a mixer, and I about pulled my hair out when I tried to use a whisk.
  • Don’t freak out like I did after the bread has been baking for about 35 minutes and looks real puffed and brown. Trust me, it’s not done yet. It won’t, hopefully, burst into flames.


Butter-melt at own risk! 🙂

Posted in banana bread, Comfort food, cooking with students, dessert, party food, South Korea, travel | Tagged , , , , , , , , | 3 Comments

Backpacker Baking

Difficult things Suck. I’m not a fan.

We're smiling here but we're actually terrified of the Mexican security guards with the AK-47s.

Some difficult things can’t be avoided. Like when you are going through customs. Or when you find out your boss is a lunatic. Or when you move to a country and find out that the humidity means your hair is going to look like a poof-ball 90% of the time. Living overseas for most of the last two years I have had all kind of lovely, hair-whitening experiences. 

Baking, however, should be fun. I know some people refuse to bake and being a little anti-math I don’t buy into the whole “Baking is chemistry you have to follow it to the letter” spiel either. I tend to be a little overly-optimistic about things but there is no need to be sobbing over a fallen cake in your kitchen. 

When I started my life of living out of suitcases people told me that my Southern-bred domesticity would have to take time off. For a while they were right. But then I met this really awesome guy. And we fell in love and started this insanity together. After a while I started wanting to make our hovels that schools pick for us to live in more like a home. May Rosie the Riveter and women’s lib crucify me but I felt an urge to bake again. 

Shepherd's Pie

 It shouldn’t be difficult or showy. Neither should it be all box-mixed and preservative filled. You can make simple, yummy things at home wherever you are and whatever your lifestyle. So here I am. 🙂 

Thought for the day: “Backpacker Baking” refers to the fact that whenever I go to our village’s grocery store I can only carry a week’s worth of groceries on my back. These recipes are going to be pretty simple because if I started making recipes with 15 different ingredients I’d need to take up weight lifting. That’s not an option.

Posted in Comfort food, Mexico, South Korea, travel | Tagged , , , , , , , , | 1 Comment